Stretch Your Own Canvas
DIY: Beginner Level
Want to buy beautiful canvas art but hate that the framing is as expensive as your art? It’s possible to DIY the process, even if you’re a beginner with no power tools. Here’s how:
I purchased this kit on Amazon (not an affiliate link yet, but maybe one day) https://www.amazon.com/gp/product/B071XVFMS1/ref=ppx_yo_dt_b_search_asin_title?ie=UTF8&psc=1 It comes with all the necessary pieces, already cut to the right size (you have to specific your canvas size when ordering. The directions, however, skipped some steps, so I’m going to walk you through it and show you the one adaption I made to the process.


- If your canvas came with a white border around it, hold it up to a window or a light so you can see where the border is through the back. Make pencil marks along that border so you’ll have the correct placement on the other side.
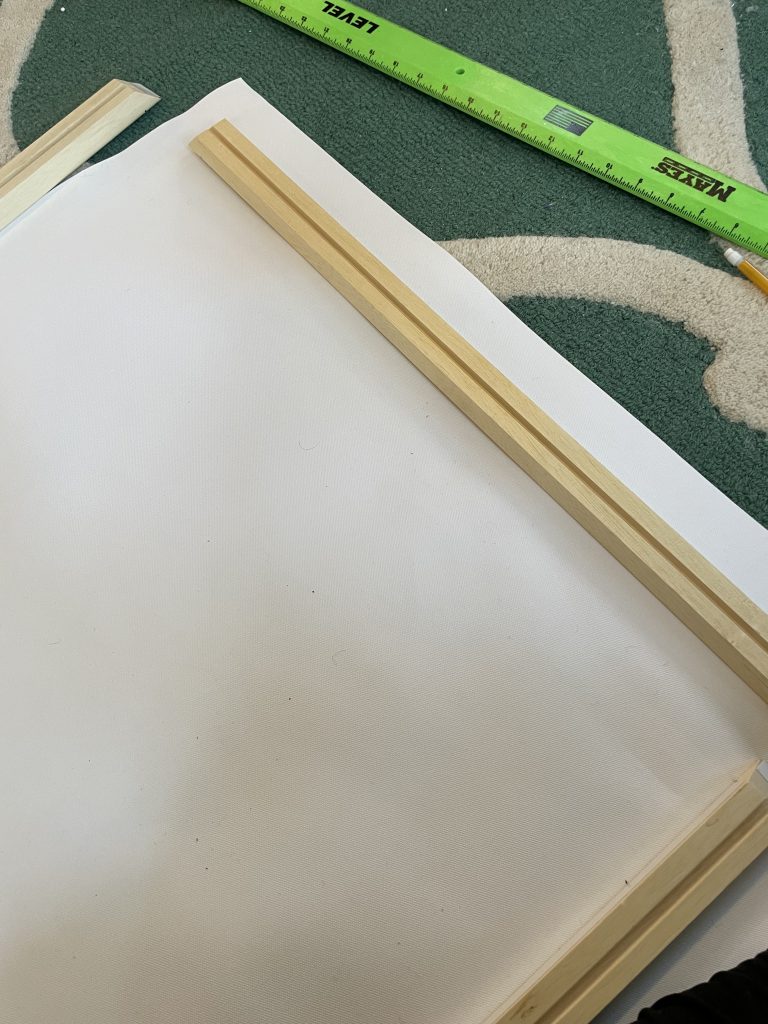
- Lay out your canvas upside down, brush off any dust, and place the 4 wood pieces on the back to see how they will fit together so you can plan it out.
- There are some tiny holes near the ends of your wooden pieces. Make sure they are facing out so that when the canvas edge is rolled around them, you will still be able to access them. Staples will go in these holes later.
- Peel the sticky backing off the first one and lay it down on the canvas…
- Place the next wooden piece, first checking to your placement and to see that the corners of the beams next to each other will line up when you roll them together.
- Once you have two perpendicular pieces set in place, cut off the corner at a 45 degree angle and cut a slit toward the middle (also shown in the instructions). Fold down your corner pieces onto the end of the wooden rod and stick it down.
- Do the same with the next one, rotating the canvas as you go.
- Double check that your corners all match up correctly often. This is likely the most important step.
- Insert the big staples that come with the kit into the holes provided in your wooden sides.
- Stick the flat pieces into the slits on the corners to add support to the corners.
- *Amendment I made: As this was my first time using this kit, I didn’t notice the holes provided (and they weren’t mentioned until the end of the instructions — I’m the worst about not reading ahead), so I didn’t leave them accessible. I tried hammering the staples straight into the wood, but it wasn’t very sturdy. In fact, the whole thing felt really flimsy, and after a few days, the canvas started peeling back from the glue in some spots. I’m not sure how it would feel if I’d done it correctly, and I’m hoping to order another piece of art later this year to try it again. Anyway, I fixed the lack of stability with a staple gun and I’m pretty sure I would want to use it next time, too. If you don’t have one, you could probably hammer some small nails around the whole thing. But honestly, a staple gun is under $30 at your hardware store, and it’s a wonderful start to a DIYer’s tool box. I’d recommend one that does both staples and brad nails to get better bang for your buck. I just put staples every few inches around the whole piece. I used maybe 20 staples total, resulting in a MUCH sturdier build. It’s the same thing the pros do, only they have to cut their wood to size.
To compare, I called around and found that for my size canvas, a local framing shop would have charged me $125, as compared to the $35 I spent on the DIY. I call that a win!